Missing football already? Here’s a homebrew Hail Mary
Super Bowl XLVIII is history and the world has turned its collective attention to the Sochi 2014 Winter Olympics, but before I hang up my big foam finger and retire the word clinch from my vocabulary until August, let’s take a moment to celebrate a gridiron tradition: the Hail Mary play. A long-shot pass down the field with a minimal chance of success, a last-ditch effort for a team with nothing to lose. I don’t know who did it first, but presumably many years ago some coach realized that when faced with an all-or-nothing situation, it can’t hurt to do something crazy. Whoever that coach was, he would have made a great homebrewer.
My own homebrew Hail Mary happened at the end of last year. I can take credit for the execution, but the idea for the play came from my wife/recipe consultant Lisa.
On Thanksgiving Day, I finished my pumpkin ale, leaving me with an empty tap and nothing ready to serve. I must have been complaining loudly, because Lisa stepped up, baby in hand. “What are those?” she said, pointing to two 1-gallon carboys hiding in the shadows at the back of the closet under the stairs.
A few years ago I started making occasional small batches. After realizing that the 1-gallon carboys my homebrew supplier sold for $5 were nearly identical to the gallon-size glass jugs of organic apple juice at the grocery for $7, I just bought the juice and figured I’d save the jug when it was empty. But why waste that apple juice by drinking it when I could ferment it instead? Plain apple juice is all you need for a simple dry cider, so I pitched 3 grams of Safale S-04 into the jug and sealed it with a stopper and airlock. Incidentally, I chose S-04 for its high flocculation, assuming it would yield clearer cider. I was wrong; later I learned about pectin haze, a common “flaw” in ciders caused by pectin in apples and treatable with pectic enzyme if you care to. (As it turns out, I don’t mind hazy cider, so I’ve never bothered with it.)
I bought four juice jugs, but didn’t ferment them all at once. I pitched Batch #1 right away and bottled it four weeks later (oh, the anticipation of something new). I made Batch #2 a few months later and bottled it after eight weeks, then pitched the yeast cake into Batch #3. That was September 2011, right around the time I remembered that I like beer much more than cider and would rather drink it instead. I managed to finish off the cider I’d bottled, but held off bottling more until I was ready for it.
And then forgot about it completely.
In early February 2013, I was telling a friend how easy it is to make apple cider, and suddenly remembered the carboy that had been sitting there for nearly a year and a half. Trepidatious about tasting a seventeen-month-old cider, I put off the moment of truth by making Batch #4 instead, figuring I’d bottle both batches later that year. Of course, “later that year” soon became “Oh shit, it’s November.”
And that’s how we found ourselves on Thanksgiving Day looking at two little carboys full of cider with a combined age of thirty-six months. I reminded Lisa what they were, and voiced my concern that they might not be drinkable after all this time. I hated to spend the time bottling them if they weren’t going to be any good. I wondered if I should toss them.
“If the alternative is throwing them away,” she said, “why not keg them and blend them? Add some spices to mask the imperfections if you need to. Actually, make it a holiday cider with mulling spices.”
This, Internet, is just a glimpse of the general awesomeness of this woman and why I’ve been with her for twenty years …
As great an idea as it was, I reminded her that I already had plans for the now-empty keg. I needed it for another beer that was ready for cold storage but wouldn’t be ready to drink for a month.
“Just buy a new keg,” she said. “Do they make small ones? Then you’ll have a portable keg so you can take it out of the house.”
… twenty wonderful years.
My memory is hazy as to when exactly I ordered the keg, but I’m sure I waited at least 75 seconds after she suggested it. A few days and trips to the store later, I made a spice potion with:
- 4 oz vodka
- 1 1/2 cinnamon sticks, whole
- 1/2 tbsp crystallized ginger, minced
- 1/2 tsp allspice, crushed
- 1/2 tsp nutmeg, grated
- 1 clove, whole
- 1/2 tsp star anise, crushed
- a dash of grains of paradise, crushed
- zest of 1 orange
I let the potion steep until mid-December and racked it just in time for the holidays. I may not be much of a cider guy, but I was impressed.

Tart and dry, a little astringent, fashionably sour. The star anise was a little overpowering, but the cinnamon and clove really backed it up. The spices were strong, but that’s what elevated it from “just cider” to “holiday cider.” A friend sampling a glass came up with the brilliant idea of mixing it with ginger ale, which became my favorite way to drink it. I named it VertiCore, fitting for a vertical blend of apple ciders. And if I hadn’t bragged about it to everyone who tasted it, they’d never know that half the blend was over two years old.
So the Hail Mary paid off in a big way, thanks to a good play call by a great recipe coach. In fact, I may just lose another cider or two in the back of the closet. Christmas is coming again in 2016, right?
The quest for a quicker brewday
Wasting my time
Resting my mind
And I’ll never pine
For the sad days and the bad days
When we was workin’ from nine to five– Pink Floyd, “Biding My Time”
In February, a friend just starting out with extract brewing came over to observe my all-grain brewday. The hot liquor tank had just been fired up for the mash-in when he arrived at 10 a.m.. I mentioned casually that I would be working until about 5 or 6 p.m.. He looked at me in wonder and said something like, “Wow. I can’t imagine what would take eight hours.”
Of course, he was speaking from his experience with extract. Many all-grain brewers probably can imagine an eight-hour brewday. The mash and sparge – i.e., the very things the extract brewer doesn’t have to contend with – can easily add three hours once you factor in the time to heat water, vorlauf, etc. Not to mention time spent cleaning the extra equipment. But my friend’s curiosity got me thinking about whether I could be doing anything differently to speed up my brewday.
I was reminded of the article “Speeding Up Your All-Grain Day” in the March/April 2012 issue of Brew Your Own magazine by Dave Louw, which applied the Critical Path Method of project management to an all-grain brew day to find the shortest distance between Point A (setting up equipment) and Point Z (putting away clean equipment while yeast happily devour the meal you’ve set for them). The principle Louw applied was to identify the tasks that must be done sequentially and focus on those, working in the other required tasks while those are taking place. If you sanitize your fermenter while wort cools, you’ve got the idea.
By sticking to the Critical Path, Louw illustrates how an all-grain brewday can be begun and done in less than 4 hours, though his example is extreme to illustrate a point. There’s an abbreviated 45-minute mash. A no-sparge lauter. A 60-minute boil. All legitimate techniques, but not “my way”. Yes, my 60-minute mash, double batch sparge, and 90-minute boil make for a nearly nine-hour brewday – ten in summer thanks to slower cooling. But I get consistent results. And I’m happy brewing my way.
Was that the choice I was faced with? Between being happy and being fast? I set out to test this on a recent brewday.
NOTE: The following is about as scientific as I get. Unlike some of you homebrewers with backgrounds in engineering or chemistry, I’ve got a liberal arts degree in English and classical studies. I can’t build an Arduino-controlled HERMS system, but I can identify zymurgic puns in classic works of literature and explain the origin of the word “Saccharomyces”.
The brew was about as simple as it gets: a Maris Otter-Fuggles SMaSH ale. 9 pounds of malt and a handful of rice hulls, 1.25 oz of hops each at 60 and 15 and 1 oz at flameout, and Safale S-04. Nothing fancy, just a vaguely English fast-flocculating pale ale to fill an empty keg in 4 weeks. It seemed right for my experimental “rush brewday”.
I did everything I normally do – no shortcuts – but not wasting any time, either. At no time was I sitting on the porch reading a book and enjoying a beer or coffee. I did little tasks while the Critical Path was running: set gear up while water heated, measured out hops while the mash rested. During the boil I even got a head start on the one task that’s so unpleasant I usually save it until the end, or the next day: cleaning.
I didn’t stop. I was so busy going about the various tasks of my “rush brewday” that I completely forgot to hook up the iPod and listen to some Rush.
And I finished in six hours. My “Critical Path” looked something like this:
| Critical Path | Other Tasks |
| 11:00 | Setup pots, burner, etc. | ||
| 11:15 | Begin heating strike water | ||
| 11:25 | Mill grain | ||
| 11:45 | Preheat MLT with strike water | ||
| 11:50 | Mash in | ||
| 11:55 | Set mash timer for 60 minutes | ||
| 12:15 | Heat sparge water | ||
| 12:35 | Boil water for yeast rehydration | ||
| 12:55 | Vorlauf & first runnings | ||
| 1:05 | Begin batch sparge #1 | ||
| 1:20 | Vorlauf & second runnings | ||
| 1:25 | Begin batch sparge #2 | ||
| 1:40 | Bring kettle to boil | ||
| 1:57 | Set boil timer for 90 minutes | ||
| 2:15 | Begin cleaning | ||
| 2:45 | Prepare wort chiller | ||
| 3:25 | Sanitize thermometer for cooling | ||
| 3:27 | Start wort chiller | ||
| 3:58 | Stop wort chiller | ||
| 4:00 | Whirlpool cooled wort | ||
| 4:05 | Sanitize fermenter, hoses, etc. | ||
| 4:30 | Transfer wort to fermenter | ||
| 4:37 | Rehydrate yeast | ||
| 4:40 | Aerate with aquarium pump | ||
| 5:00 | Pitch yeast |
The one thing I should point out is that I did leave some of the cleaning for the next day. Just the mash tun and brew kettle, which I like to soak overnight with PBW anyway.
The beer isn’t in the keg yet, but it’s going to be great. I hit my target OG and FG perfectly, so consistency was achieved. And I did it all in six hours instead of nine. That’s a pretty definitive result (see note above re: “This is as scientific as I get”). But I was exhausted by the end of the day. And though of course brewing is always better than nine hours at the ol’ day job, my rush brewday was nothing like the relaxing experience I usually get as the other reward for my brewing labors.
And isn’t the fun why we do it? It’s why I do it.
So I’ve done some English-major-level science and answered my own question. Yes, for me it is a choice between happy and fast. And experience has cured me of my desire to brew faster. Don’t get me wrong, it’s great to know that by busting my ass, I can get a simple brew done in six hours and still have time to shower before leaving the house if I have evening plans for dinner … or whatever.
But unless I have to, I’m not gonna.
Bottling shortcuts for the bottling-averse homebrewer
No task in homebrewing gives me such mixed feelings as bottling. On one hand, it’s the last leg of the beer’s journey from grain to glass, and when the cap goes on I know the next time I interact with this brew will be when I taste it. On the other hand, it’s involved: boiling priming sugar, sanitizing 55 bottles, racking, filling and capping by hand, then breaking everything down and filling with PBW for an overnight soak takes more steps and time than any other brewing task I do except the brew day itself (and brew day leaves me with a much greater sense of accomplishment).
So when I started kegging over a year ago, I never looked back. It’s just so easy and fast: 30 minutes is about all I need to sanitize and fill a 5-gallon keg, and some homebrewers cut that time in half by keeping kegs full of sanitizing solution when not in use.
But I also make the odd 1-2 gallon test batch from time to time, and I don’t keg those. I could find smaller kegs, I suppose, but that would mean dedicating one of my three taps to small-batch experimental beer, which I’d rather not. So my test batches still get bottled. At least in theory.
In reality, I’ve been putting off bottling test batches for a while now because of the hassle. The two test batches I did over the last year – a Berliner Weisse from March 2012 and a Bronze Age Fig Beer in January – were still in fermenters in the Harry Potter closet, rapidly approaching the point where more additional time wouldn’t help them. I finally had to do what I had been putting off. And since necessity is the mother of invention, I devised ways to make it easier.
First, I got smaller bottling buckets. I used to just use my full 6-gallon bottling bucket regardless of batch size. After all, unlike the fermentation vessel, the bottling bucket is not going to hold beer for more than a couple of hours at the most, so there’s no reason not to just use the biggest one you’ve got, right?
But after thinking, I came up with several reasons why having a smaller bottling bucket would make bottling a small batch easier:
- Less surface area to sanitize
- Narrower vessel = higher fill level in the bucket, making it easier to submerge the outlet of the racking hose
- Narrower vessel = more pressure out of the spigot = faster bottle fills
- Less surface area to clean afterwards
So I made 2-gallon bottling buckets from plastic pails identical to those I use for small-batch fermenters. Instead of drilling a hole in the lid for a stopper and airlock, I drilled a hole near the base for a spigot with a 1″ spade bit:

Easy, even for someone as DIY-challenged as myself.
If you try it at home, keep a firm hand on the bucket and drill and be aware that it will cut through plastic very quickly, so a momentary loss of control can send you back to the store to buy a new bucket and start over. 1″ was the perfect diameter for my spigot, but I slipped and gouged a little extra chunk outside of the intended hole. Fortunately I was able to carefully hand-tighten the spigot to compress the interior gasket enough so that it spread to cover the leak.
The other shortcut I used was Coopers Carbonation Drops instead of bulk priming the entire batch. I’ve used these things on and off since my beginnings as an extract brewer, and I’ve been spoiled. Even now, weighing, boiling and cooling priming sugar is for some reason a huge annoyance to me and ranked among my worst first-world problems. But bulk priming does carbonate a little more consistently than the Coopers drops, so I do it, usually. But not with test batches. I consider them experiments anyway, so I’m not concerned about minute and virtually undetectable carbonation variations from bottle to bottle.
It took me an hour to sanitize two sets of equipment, rack two batches, and package 13 bottles of fig beer and 9 bottles of Berliner Weisse.
I still find kegging to be easier, and I’ll keg full-size batches whenever possible unless I have a reason to bottle them, in which case I’ll have to break out the big bucket and clear a couple of hours on my calendar. I also have a new Blichmann BeerGun I haven’t yet used which can bottle force-carbonated beer from the keg, but I’ll probably limit its use to bottling a few off the keg to give to friends. For test batches, I think I’ve found my process.
And the right equipment makes every process easier. It’s great to know that now, with a few additions to my homebrew arsenal, bottling is no longer a chore to dread, but a milestone to look forward to.
Bronze Age Fig Beer, Part 2: The Reckoning
In my last post, I described the brew day for my Bronze Age-inspired fig beer, which ended with me pitching a yeast starter made from Dogfish Head Midas Touch dregs. I didn’t have an especially good reason for fermenting this brew with Midas Touch dregs, except for thinking that it would be good luck for my ancient ale experiment. Moreover, it was my first time cultivating bottle dregs, and I didn’t really study up on it that much ahead of time. I was making it up as I went.
I watched the fermenter, counting the hours of the lag phase and waiting for signs of fermentation. 24 hours passed. Then 48. The airlock refused to bubble. I didn’t panic, knowing that the lid on the small-batch fermenter I “made myself” (translate: “bought a 2-gallon pail and drilled a hole in the lid to fit a stopper and airlock” – sorry, I’m not exactly Bob Vila) doesn’t always seal perfectly and gas might be escaping from somewhere besides the airlock.
After three days, I picked up the pail and looked through the translucent wall for krauesen. Seeing nothing, I decided it was time to intervene.
When I cracked the lid, it was like looking at the surface of a dead alien planet. The wort was still and clear, reflecting the concerned look on my face like a pane of amber glass. The only blemishes on the surface were a few bits of fig seed that had started to grow mold. Aside from that, there was no sign that anything was living in there.
The first thing I did was remove the moldy fig seeds with sanitized tongs. Well, no – the first thing I did was drop an F-bomb. Then I removed the moldy fig seeds.
I took a sample of the wort and tested the gravity. It was 1.073, 5 points down from original gravity, which I attribute to the fact that the OG was taken before I added a relatively high volume of lower-gravity starter. In other words, fermentation had not commenced.
I tasted the sample, finding it as sweet as the day I made it. I tasted honey, figs and malt. No alcohol, no bready yeast flavor and no transitional fermentation by-products like acetaldehyde. Fortunately, there was no apparent infection flavor, either: no musty mold taste and no sign of bacterial souring. So it was in stasis, not ruined.
There was really nothing to do except to pitch fresh yeast. I had a packet of Fermentis Safbrew T-58 on hand for exactly this emergency, so I measured out 6 grams and pitched it. I attempted to stir it with my drill-mounted whip to re-aerate the wort, but the drill battery was inexplicably dead (I’ve recently deduced that I have a kleptomaniac poltergeist in the house with an eyewear fetish; perhaps it’s fond of power tools as well). No matter, I closed the fermenter back up and within 12 hours the airlock was gurgling like a freshly risen zombie.
To be honest, I wasn’t that surprised that I didn’t get viable yeast from the bottle. I never did see any definite fermentation activity in either the first or the second stage starter. And the second stage starter had me a little nervous all along. I couldn’t say what was wrong with it, but it never looked right.
What did I learn from all this? Quite a lot, actually. Here are the CliffsNotes:
- Leaving something as important as yeast selection to superstition isn’t going to get us anywhere.
- Read up on new techniques before trying them. Always.
- When winging it, expect setbacks and have a Plan B.
- Trust instinct more when something doesn’t seem right.
- Always check the drill battery the night before it might be needed.
There’s one more thing I learned. This was my first infection ever in four years of brewing. It happened in a wort that contained solid fruit and that I essentially didn’t pitch yeast into for 3 days. And the extent of unwanted microbial growth was two mere spots of mold on floating fig seeds, nothing more. That’s evidence that my sanitation practices are legit. I’ll drink to the knowledge that I’m doing something right.
Cultivating bottle dregs
UPDATE NOTE: This post describes a failed attempt at cultivating bottle dregs. If you’ve found this page looking for information on how to cultivate bottle dregs for pitching into beer wort, thank you for reading but please do not follow my process below. It didn’t work for me, as you can read in my follow-up here.
After deciding to brew a Bronze Age-inspired fig beer, I quickly went to work on the recipe in the hopes of brewing it on Monday (which I have off from my day job). It’ll be a 1-gallon experiment batch, with 2-row barley and rauch malt for that Bronze Age kiln-smoked flavor. Bitter orange peel will feature as a flavoring, and I haven’t decided yet whether it’ll have minimal hops or none. Honey and figs will round out the flavor and provide additional fermentable sugar. For yeast, I plan to cultivate a 2-step starter from the dregs in a bottle of Dogfish Head Midas Touch.
I’ve never cultivated a starter from bottle dregs before. Why now, and why Midas Touch? One usually hears about brewers cultivating dregs from sour beers like Orval to harvest the unique blend of Brett and bacteria strains that make those beers special, as described in this blog entry from TheMadFermentationist.com. But it should work with clean Saccharomyces as well.
I’m not sure what kind of yeast is used to ferment Midas Touch, though clone recipes online call for Trappist ale strains. I don’t even know if the yeast Dogfish Head bottles Midas Touch on is the same as the yeast that ferments it – many breweries use different yeasts for bottle conditioning. So my decision to use Midas Touch dregs was less about capturing a particular unique yeast than it was about superstition.

9 out of 10 prehistoric shamans agree: Consume your totem’s essence to gain its power.
Midas Touch is one of Dogfish Head’s “ancient ales” and is based on chemical analysis of bronze vessels found in Gordion in Central Turkey – roughly the same part of the world as Cyprus, where my fig beer has its inspirational roots. I thought the dregs might be a good luck charm for my first foray into ancient brewing: a little piece of the magic from Sam Calagione and Dr. Patrick McGovern, two of the high priests of modern ancient ale reproduction. But really, the main reason I did it was because it sounded like fun and I’ve never done it before.
I made a first-step starter wort of 200 milliliters to bring the bottle yeast back from the dead. When that ferments out, I’ll “step it up” to a second starter of 500 mL. For a full 5-gallon batch I’d continue stepping up to 2 liters, but for a 1-gallon batch, 500 mL should suffice.
I scaled down my usual starter process as well as I could, realizing it’s okay if some the math isn’t exact in a wild-shot experiment. I dissolved 15 grams of extra light dry malt extract in 200 mL of boiling water. Usually I use 1 gram per 10 milliliters, but I’m hoping the lower OG starter will give a little advantage to sleepy yeast.
I also added 3/32 of a teaspoon of yeast nutrient. While that sounds like a strange fraction to use, it’s simply one each of the “pinch” and “smidgen” measuring spoons (or 3 “smidgens”) available at specialty kitchen stores. Those little spoons aren’t all that useful on a day-to-day basis, but I keep them around just for tiny measurements like this. For the record, an exact scaling of my usual 1/2 teaspoon nutrient per liter of starter would have been 1/10 teaspoon.

It was almost too small to boil on the stovetop.
5 minutes of boiling reduced the starter volume more than expected, so after I cooled it and transferred to a sanitized pint glass, I topped off with pre-boiled water and chilled in the freezer to an acceptable pitching temperature of 84°F. I roused the yeast in the last half-inch of a bottle of Midas Touch (which I had already poured into a glass and was drinking) and pitched it.

Ready for the stir plate.
As of today, there’s no visible sign of fermentation in the starter, but there is a pleasant boozy smell coming from the glass. There’s no telling how few viable yeast cells were in that bottle, but even a few cells should reproduce given time.
We’ll see how it shakes out by Monday. I never do anything too crazy without a safety net, so I have a packet of Fermentis Safbrew T-58 – a spicy Belgian yeast strain with reported clove notes, which should go well with honey, fig and smoke – on hand just in case I don’t get a usable starter. But that’s Plan B.
Here’s hoping the Bronze Age beer gods smile on my undertaking.
Crystal malts in IPA: the wisdom of Mitch Steele
In my recent review of Stone Enjoy By 12.21.12 IPA, I mentioned that I enjoyed it a lot, but was surprised that it had “less melanoidin flavor than I usually want from an IPA.”
Here’s an interesting postscript and mea culpa. I just listened to a Basic Brewing Radio podcast released December 13, in which Mitch Steele, head brewer at Stone Brewing Company and author of a new book IPA: Brewing Techniques, Recipes and the Evolution of India Pale Ale (which I received for Christmas, and it looks like a great read) advocated:
minimizing use of crystal malts in IPA, [which] adds a level of sweetness and malt intensity that [can] kind of mask the hop character … as the beer ages, the crystal malt immediately turns into that dried raisin, fruit character which really knocks the hop character down.
He recommends rye, wheat, or even light Munich malts as a substitute, and says he prefers these malts to crystal in his own IPA recipes. He said that Stone doesn’t often use rye particularly in their beers due to lautering concerns with their brewhouse equipment, but he would like to.
I was always under the impression that crystal was more or less a necessity in IPA, to add exactly the kind of residual sweetness that Steele cautions against. Far be it from me to disagree with him, because he literally wrote the book on IPA, and Stone’s selection of great IPAs speaks for itself. I’ve deduced that Mr. Steele practices what he preaches, and the grain bill for Enjoy By IPA – a beer he had significant creative control over as head brewer – contained little, if any, crystal malt.
It was that sweetness of crystal malt that I was expecting to find in Enjoy By IPA and missing (well, maybe not “missing”, because the beer was spectacular). I incorrectly identified it as a lack of melanoidin flavor, when it was actually a lack of caramel flavor. Caramel flavors come from using stewed, sugary crystal malts (also known as caramel malts; surprise, surprise) in beer. Melanoidins, on the other hand, are the toasty flavors associated with German beers that one gets from decoction mashing and boiling malts such as Vienna and Munich.
Assuming Enjoy By IPA had Munich in its grain bill and not crystal – as per Steele’s own advice – what I was probably tasting was melanoidin. Or at least a subtle, barely detectable background of melanoidin that allowed the hops to take center stage; as opposed to caramel flavors competing with hops for the spotlight in the name of balancing bitter and sweet.
Maybe that’s exactly what Mitch Steele realized, leading him to his decree. If so, I like his style; and I’m going to learn from it. My last IPA had 1 pound of crystal malts compared to 1.5 pounds of Munich, a 2:3 ratio. How much better would the hops taste if I changed that 8 oz of crystal and 2 pounds of Munich (1:4)? Or only 4 oz of crystal (1:8)?
The real tragedy is that December 21 has come and gone, and I won’t be able to find Enjoy By 12.21.12 IPA again. If I do, it’ll be past date. It seems kind of heretical to drink a beer called “Enjoy By 12.21.12” after the date on the label, doesn’t it?
This will be my last post of the year. Happy new year from the Zyme Lord, and I’ll see you in 2013.
Baggings! We hates it forever!
My Hobbit-inspired Old Took’s Midwinter IPA is now in the keg. If it seems like that happened really quickly, it’s only because of how late I posted my blog post about the brew day. I fermented it for three weeks before dry hopping it for 6 days. All in all, it was about 4 weeks from mash tun to keg.
I dry hopped it with an ounce each of the same finishing hops I used in the boil, hoping to achieve a nice mix of floral and citrus aroma notes to round out the beer:
- 1 oz Willamette (4% AA)
- 1 oz Cascade (6.2% AA)
It’s been in the keg for less than a day, so it’s too early to know for sure how it’s going to turn out. It tastes good, and it’s got more hop character than it did a week ago. So I think it’s going to be good, but I’m a little concerned that this wasn’t my most successful attempt at dry hopping.
In the past, I’ve dry hopped with pellets either tied in a disposable loose-weave muslin bag, or tossed into the fermenter loose. I prefer loose over bagging if possible for maximum contact, but hop particles in the keg are a problem with more than about a half ounce of hop pellets. With 2 oz of loose pellets, I’d be serving up pints of hop debris for a month.
I didn’t have any muslin bags on hand, nor any time to go to Austin Homebrew Supply to buy any. Searching local retailers for a solution, I came across these spice bags at a kitchen store. They’re for chefs making bouquet garnis, but they are muslin (a tighter weave but still porous), and they are advertised as reusable. The biggest drawback I could see was that they were smaller than the bags I usually use, but since I got 4 in a pack I figured I’d use several.
When bagging dry hops – or when using a tea ball-type infuser, which is also popular – the size of the bag or ball is important. Hops shouldn’t be packed too tightly or else you reduce the surface area in contact with the liquid, which decreases the amount of hop goodness that gets into the beer. After sanitizing the bags with boiling water, I split up my 2 oz of hops into 3 bags along with sanitized marbles for ballast. Two thirds of an ounce per bag seemed to provide lots of breathing room, although I knew the hops would expand a little.
I didn’t count on just how much they would expand.
After I racked the beer into the keg, I found my 3 muslin spice bags at the bottom of the fermenter. The hops had expanded so much the bags looked about to burst, like overstuffed pillows. I didn’t worry about it too much until I was cleaning the bags out, in the hopes of maybe reusing them someday. As I emptied the bags into the kitchen sink, I inhaled deeply, smelling the rich, floral-citrus bouquet coming from the green sludge washing down the drain.
And then it hit me: that’s hop aroma going down the drain. Not in my beer.
The hops expanded so much in those small bags that they ended up packed too tightly. Some of the available hop compounds got into the beer, but not all. So the beer is better than it was, but not as good as it could have been. Should have been. And I’m left feeling disappointed at the waste. A spontaneous decision potentially compromised the end result, and that’s going to bother me until I taste the chilled, carbonated beer and know for sure.
If only I had just used my usual bags! Or something else – anything else!
I should breathe deep and repeat the mantra of Charlie Papazian: Relax. Don’t worry. Have a homebrew. Even if the IPA isn’t perfect, I haven’t ruined it. It’s far from the worst disaster ever to befall a homebrewer, and it’s certainly not the worst thing I’ve faced. Yes, it was avoidable and it’s annoying, but the beer will be fine.
Then from the back of my brain comes a nagging: Is “fine” really good enough?
It’s not beyond repair. I can still add more dry hops to the keg, if needed. And I probably will. But I’ve learned my lesson. I’m sure I’ll find many other uses for these spice bags in the brewery, such as infusing dry herbs that won’t expand. But I don’t think I’ll be bagging dry hops in anything smaller than a nylon stocking in the future.
He who controls the spice …
I had to take a break from blogging last week due to the Thanksgiving holiday here in the United States, during which I played host to my in-laws for several days of family hijinks to the tune of college football, backyard-fire-pit s’mores, an Eddie Murphy retrospective on BET, and lots and lots of imbibed homebrew. I return with many stories I’ll share in the coming days: a rousing adventure of a non-traditional 3-course Thanksgiving beer dinner, and a saga of a Black Friday brew day so bitter it took six bowls to contain all the hop additions.
But first, an update on Colonial Progress Ale. After nearly 4 weeks in the fermenter, it’s just about finished with a gravity of 1.007. That’s a bit more attenuation than I expected, so it will be higher in alcohol, but that may not be a bad thing for a winter session ale.
I’m pleased to report that as the yeast slowly flocculates out, it’s leaving the beer with a much cleaner taste than I was getting from it even a week ago. When I sampled it on Thanksgiving, it was fruity and a little sulfuric. Now it’s clean tasting and very dry, with only a hint of mineral flavor from the molasses and a burst of herbal bitterness from the late spice addition of sweet gale and juniper berries.
What’s missing is any sign of herb or spice in the aroma/flavor arena. So today, a few days before kegging, I made a “spice potion” with the remaining sweet gale and juniper berries.
What’s a spice potion? Despite sounding like something from a Dune or Harry Potter book (or some sick and unnecessary crossover that I would nevertheless read because I friggin’ love both those series: Harry Potter and the Floating Fat Baron? House Elves of Dune? I’m looking at you, J.K. Rowling and Brian Herbert) a spice potion is a method for adding spices or herbs to homebrew without boiling – and thus losing many of the volatile compounds that give those ingredients their distinguishing features – and that’s more elegant than simply throwing them in the fermenter.
It’s simply soaking the herbs/spices in distilled liquor to extract the essence. As I understand it, this works because alcohol is a better solvent than water, so more of the flavor and aroma compounds are extracted than in water steeping, and no heat means the subtler characteristics of the ingredient are retained. And since it’s distilled spirit, it’s safe to add to the beer without fear of infection. Any spirit will do. Vodka is common because of its neutral flavor, but depending on the specific ingredient being extracted, I’ve heard of people using rum, tequila, or whiskey (whose name, incidentally, comes from the Gaelic phrase uisce beatha meaning “water of life”, which is also a solution of pure spice essence in the Dune series – and now we’ve come full geek circle).
I used vodka. And since quality isn’t really important for the small amount that will end up in the beer, I used the cheapest vodka I keep on hand: the stuff that comes in a 1.75-liter bottle for $9, which I use to fill my airlocks (never for drinking). I muddled a quarter ounce of juniper berries with a gram of sweet gale in a mortar and then placed it in a sanitized glass with about 2 ounces of vodka. The resulting mixture wasn’t pretty to look at, but had an herbal/tart aroma pleasantly similar to gin.
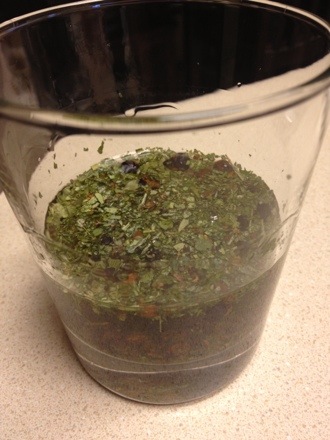
Only the Water of Life will free what can save us.
I’ll let the potion steep, covered with sanitized foil, from now until Sunday. Then I’ll strain out the chunks, add the essence to the keg, and rack the beer on top of that. Since the bitterness is already prominent in the brew, I think this is the last little flavor kick the beer needs to make it ready for prime time.
Watch this space for the next few days as I share my stories from Thanksgiving week. Since there’s no turkey or shopping involved in either of them, I’m sure you’ll enjoy them despite the passage of time.
Until then, keep the spice – and the beer – flowing.
The boldness of new beginnings
Foaming with abandon in the Harry Potter closet is a 2-liter Erlenmeyer flask on a stir plate, filled with a starter of White Labs WLP008 East Coast Ale Yeast.

She ain’t pretty, but she’s mah baby.
Anyone reading this who has been using liquid yeast without a starter should jump on the starter train. Seriously. It’s as easy as making a tiny unhopped extract brew, because that’s exactly what you’re doing. Just bring 1-2 liters of water to a boil – higher gravity worts will need bigger starters; see YeastCalc for the volume recommended for your batch – add dry malt extract at a rate of 100 grams per liter and some yeast nutrient if you’ve got it. This will make a wort of 1.035-1.040, which is perfect for a starter regardless of the OG of the batch it’s going in. Boil, cool and pitch the yeast. Ferment for 2 days, then cool in the fridge for at least 24 hours before making the “real” wort. Most of the yeast will drop out when chilled, leaving clear (but vile – don’t drink it) “beer” which should be decanted, leaving behind the yeast cake and just enough liquid to swirl up into a slurry. Pitch and watch the magic happen. If you’ve got good sanitation techniques, making a starter carries minimal risk. The rewards are higher pitching rates and better beer. And it’s so easy, there’s no reason not to.
This starter was pitched with yeast that expired in July. I’ve worked with expired yeast before. The yeast/bacteria blend in my Bacillusferatu Berliner Weisse was expired for ten months before I pitched it, though that was into a 1-gallon test batch of a low-gravity wort intended for souring. This starter is going into five gallons of wort for a very different beer: my long-overdue Colonial Progress Ale, from a recipe slightly modified from one I posted in April. Details forthcoming after I brew it this weekend.
As the photo above shows, the expired yeast is spewing so much krauesen I had to wrap it in a paper towel. The expired yeast are healthy as can be, and that’s no surprise. Sure, the expired vial had no more than about 10% of its original population of viable yeast cells, but so what? Yeast cells are dying every day in every carboy, keg and cask in the world, but fermentation continues. Many homebrewers culture yeast from commercial bottle dregs and make great beer with it. Given enough time, even a few sad, dying yeast cells will get their freak on, reproduce and ferment wort. It’s just that the first generations will be weak and languid, and make lots of foul-tasting byproducts doing it.
The purpose of the starter is to make sure those nasty byproducts end up in a beer that’s destined for the drain, not your gullet … while the real wort gets inoculated with a healthy colony of the naturally selected descendants of those few Saccharomycean pioneers who survived the long winter.
So don’t ever be afraid to use expired yeast. Don’t throw it away. You should be making a starter anyway. For fresh yeast, a starter is a leg up. For expired yeast, it’s a new beginning.
Speaking of new beginnings, best of luck to my friends and fellow writers undertaking National Novel Writing Month (“NaNoWriMo”) this November. The goal is to write 50,000 words of a novel in 30 days: fast, raw, unedited. I’ve done it four of the last five years and made it across the 50k mark each time. But I won’t be doing it officially this year. I’ve got too many short stories I want to work on, and a novel already in progress, and I don’t want to distract myself with something new. But I am using November as an excuse to write every day: a blog post, story, novel chapter, anything. I did catch wind of a blog-centric version (“NaBloPoMo”), but I love my readers far too much to subject you all to a bunch of hurried blog posts on whatever random bullshit I can think of to write about.
What do you mean, too late?
Tapping the All-Galena Pale Ale
Today I kegged the all-Galena hopped American Pale Ale I brewed on the Fourth of July. That’s 7 weeks ago, a long time even by my standards. Due mostly to my day job, I haven’t had friends over nearly enough this summer, so I didn’t have a free tap until now. The Galena APA has been sitting in the primary in the Harry Potter closet all this time.
On the spectrum of anxiety over long rests on the yeast cake, I’m in the middle. I’m not one of those homebrewers who racks off the primary after a week, and I don’t usually secondary at all. But anything longer than 4-5 weeks and I start to get a little antsy. My inner critic kicks in and I begin scolding myself for letting my busy schedule and personal inertia destroy an innocent homebrew by allowing it to age past the terminus of perfection and into the sinister, uncouth dark age of spoilage. Then I get OCD about it. I sniff my hydrometer samples for the telltale “rotting meat” and “shrimp” aromas supposedly typical of autolysis. Once my fears are quelled, I leave it for a few more days, still fearing that the next time I take a sample, it will be too late.
Yes, I could just rack to a carboy after 4 weeks, but that would risk oxidation, which I consider a much more real and terrifying bogeyman than autolysis. I won’t rack unless I intend to age for a long time.
So I’ve been wary for a couple of weeks. But when I took the last sample before kegging, the beer didn’t smell like my Uncle Brian’s backyard during one of his legendary shrimp boils, so that was a good sign. It doesn’t taste like excrement either – huzzah, bullet dodged again.
But more interesting than this tiny conquest over beer-death (hey, I take the victories where I can get ’em) was the result of the dry hopping.
I added a half-ounce of Galena pellets (12.8% AA) a week ago. I always dry hop APAs and IPAs, but especially wanted to do so this time on account of the hop aroma lost during the long rest. Galena isn’t commonly used for aroma or dry hopping from what I can tell, but reports on the Interwebs had me expecting dark fruit aroma from the dry hops.
Those reports weren’t exaggerated. There’s a definite cherry/berry aroma here. It’s deceiving for a pale ale, as it doesn’t exhibit any of the notes we typically associate with “hop-forward” beers: not floral, nor herbal, nor citrusy. But it’s enticing. Coupled with the bready malt notes of the Munich in the mash, the beer ends up smelling a little bit like cherry pie, more so like a tart blackberry cobbler.
That isn’t coming through in the flavor, but I haven’t tasted it properly (i.e., carbonated and chilled) just yet. That first pint will be one for my personal record book, I’m sure. And I’m already thinking about other ways to use Galena as a late-addition hop: as a component in a late-hopped Belgian dubbel, paired with some Special B malt; or in a dry farmhouse wheat with a little bit of rye or mahlab – yeah, I’m still jonesing to use mahlab.
This could be the start of something unorthodox and awesome. You and me, Galena, we’re goin’ places.
