Unfinished business
With November half over, I'm faced with several unfinished brewing projects and more on the way.
A few days ago, I racked my ginger mead to a carboy for conditioning. Because of my pathological aversion to work which isn't absolutely necessary, I'm a believer in long primaries and won't rack beer to a carboy unless there's a damned good reason (no empty keg available, need the primary vessel for a new beer, cat fur stuck to the inside wall of the bucket, etc.) and I get good beer with up to 6 weeks on the yeast cake.
But for mead, we're talking upwards of 6 months of conditioning, and for that there's no way around racking to a carboy. Not only is it better to get the mead off that autolyzing yeast for the extended aging, but it's essential for clarity: the mead won't clarify until it's removed from the gross lees. It's amazing, in fact, how quickly it does start to clarify as soon as it's racked. Just a few days have passed since I racked it, and it's already several shades darker than it was in the primary due to the yeast flocculating out.
At racking time, the gravity measured 1.001 and the mead had a fruity, floral taste with a little ginger bite but sadly no hint of ginger in the flavor or aroma. My fermentation chamber did its job well keeping the fermentation cool, and it had none of the fusel alcohols my other (uncontrolled temperature) meads had this early on. It might even be ready in less than 6 months, but I have reasons for waiting until April to bottle it. Until then, I'll rack it every 6-8 weeks, add a few Campden tablets occasionally to prevent oxidation, and maybe hit it with some Sparkolloid closer to bottling time. And definitely some more ginger before bottling.
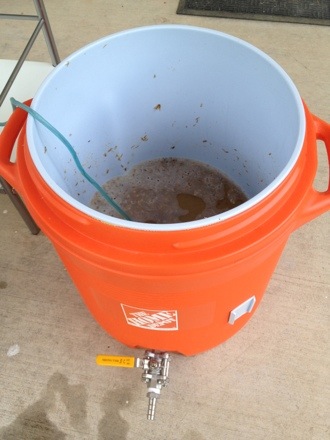
I also took the first gravity sample from the Colonial Progress Ale I brewed 11 days ago. The wort turned out a bit more fermentable than I expected and is currently at 1.009, with an ABV of 4.8% (and the WLP008 yeast, a notoriously slow flocculator, might still be working). It's got a fruity tang I expected from this yeast, and very minimal cidery character from the simple sugar of the molasses. It's really a nice easy-drinking session beer that should be very enjoyable when the yeast settles out. The juniper and sweet gale have largely faded, though. I'll add more spices to the fermenter before kegging. Who knows, I might even rack the beer for the occasion.
The next project on the horizon is an inventory cleaning extravaganza! I've got lots of open hop packets from over the course of the past year that I'll use in a beer to be brewed the day after Thanksgiving. I spent some time tonight rubbing hop pellets between my fingers (while watching Moonshiners on Discovery Channel … now those guys are pros) smelling them and even tasting some of them to make sure they were still hoppy and had none of the telltale cheesiness of bad hops. Fortunately, only a half ounce of Warrior left over from February had any distinctive cheesy notes, so back into the freezer it went to keep on aging until it magically changes from “cheesy” to “aged” and I can use it in a lambic. The other open hops made the cut and will be used next week. More on that recipe soon!
Vote for Progress … hops
Saturday was Learn to Homebrew Day in the USA, and today is Election Day. To honor both events, I did what any patriotic and pedantic zyme lord would. I made beer.
I called it Colonial Progress Ale, and it’s something between an English bitter and an English brown ale. “Colonial” comes from the fermentables, adapted from a recipe I envisioned for a colonial-style ale during a trip to Philadelphia earlier this year. I ended up with:
- 6.5 lbs American 2-row
- 1 lb Victory malt
- 8 oz Flaked wheat
- 8 oz Flaked oats
- 1 lb Molasses
Each of these ingredients was chosen for a reason, starting with American 2-row malt as the base. Wheat is common in colonial ale recipes, including one attributed to Thomas Jefferson. Victory and oats I had no historic precedent for, but I added them for body in the finished beer, along with some bready/biscuity flavor (Victory) and silky smoothness (oats) to accentuate the English-inspired malt profile. I mashed at 153°F for medium fermentability, counting on the highly fermentable molasses to dry the beer out.
The mash begins.
Ohhh, molasses. A common ingredient in beer in early colonial Philadelphia (according to a quote from William Penn), I can eat the stuff right out of the jar. But I was nervous about using it after reading John Palmer’s tasting notes ranging from “rumlike” and “sweet” (woohoo!) to “harsh” and “bitter” (ergh). But further research online suggested that harsher flavors were associated with fermenting mineral-rich blackstrap molasses, not the regular unsulphured kind. I went with regular, and added them at the beginning of the boil with high hopes.
The “Progress” part came from the hops: one ounce of 6.6% AA Progress at the 60-minute mark for bittering, and another quarter ounce at 15 minutes for flavor. Progress is a UK varietal related to Fuggle hops, a good choice for English-style ales.
But that wasn’t all I added to the boil. Hops were available to some colonial brewers, but apparently not all that prevalent, so other bittering herbs were common. My original plan was to use horehound, but I realized the medicinal flavor might overpower a low-gravity ale. I thought of rosemary, but was talked out of it by the sages (ha, ha) at Austin Homebrew Supply. I landed on:
- .25 oz Juniper berries (crushed in mortar)
- .5 grams Sweet Gale (dried)
I added the herbs in the last minute of the boil and let them steep during cooling and whirlpool. I may add more later during conditioning.
The wort had an OG of 1.046, a true session ale for the upcoming winter (insert witty apropos Valley Forge reference; I can’t think of one). I pitched the slurry from a 2-liter starter of WLP008 East Coast Ale Yeast – reportedly the Sam Adams house strain – in keeping with the colonial theme. I set the fermentation chamber to an ambient 65-68°F, a little warmer than typical to coax some vintage ester flavor from this low-flocculating yeast.

Fermentation underway after 24 hours.
By this time tomorrow, the future of the United States will be written for the next four years. But regardless of whether my guy wins or not, I’ll have something to look forward to: a beverage in the tradition of the first beers brewed on American soil. Beer has always been a part of American culture, even before there was a United States, and from #1 on down to #44 many presidents have been homebrew aficionados: George Washington, Thomas Jefferson and James Madison were homebrewers and Barack Obama bought a homebrew kit for the White House with his own money. And beer remains one of the few things people can agree on regardless of personal politics.
Don’t forget to vote today, no matter who you’re supporting. Red and blue be damned. We can all party together in the colors of the SRM scale.
Strike up the Sousa march …
This Fourth of July, I celebrated my right to make beer. Regular readers may recall that a few months ago, I posted a recipe for an American Colonial Ale inspired by a recent trip to Philadelphia. The perfect beer to brew on the Fourth of July! But silly me, I forgot all about it until after I left Austin Homebrew Supply with my ingredients for a different beer. So I’ll have to brew the colonial ale another time. Oops …
Instead, I brewed a single-hop Galena American Pale Ale, the second in my “Misty Mountain Hop” series of single-hop brews (the first was a Citra APA). This was a new grain bill entirely of my own devising, and if the beer comes out well, I’ll probably make it my standard grain bill for all APAs from now on:
- 9 lbs 2-row malt
- 1.5 lbs Munich malt
- 8 oz Crystal 40L
- 8 oz Crystal 75L
The wort looked and smelled delicious coming out of the mash tun, a sort of tangerine-copper color with an aroma like toasted artisan bread. I’ve got high hopes.

Vorlauf action shot!
The hop additions were all Galena, of course. This common bittering hop doesn’t seem to be used often for late hop additions, but I’ve read reviews of a few beers with late Galena hops that had descriptors like “dark fruit” and “tart berry”. Sounds awesome to me. I used:
- .85 oz at 60 minutes
- .5 oz at 15 minutes
- .5 oz at 5 minutes
- .5 oz at flameout
All of my Galena hop pellets were rated 12.8% AA. I’ll probably add another half ounce of dry hops before kegging for added aroma. My OG came in at 1.055, pretty much smack in the middle of the BJCP range for American Pale Ales. I pitched 15 grams of rehydrated Safale US-05 yeast.
But my real declaration of independence this brew session was from my old swamp cooler. After long deliberation (and somehow, writing about the idea a couple of weeks ago made it seem more feasible – thanks, Internet!) I finally bit the bullet and got myself a true temperature-controlled fermentation chamber: a Kenmore 5.1 cubic foot chest freezer with a Johnson Digital Temperature Controller dialed in to a range of 65-68°F.

Crazy. Sexy. Cool.
The Galena APA has been in there for a few days, and I’m still working out the kinks. Last night after I was out of the house all day, it had somehow got down to 60°F, though it was back up within minutes after I cracked the freezer lid for a while. But I can already say that this is one of the best purchases I have made in support of my homebrew habit. Ever. No more checking the closet every hour to monitor the temperature. No more keeping dozens of frozen water bottles on hand, waiting to be used in the swamp cooler, spending their idle time rolling around my garage freezer and making it harder to find more important stuff (like, you know, food). Perhaps most importantly, no more risks of infection from the stagnant water in the swamp cooler, which always bothered me. I just let it do its thing, check it once or twice a day, and it’s always been in the range I want … except for last night, but it’s never gotten higher than 68°F.
And now I am at liberty to brew what I want to brew, any time of year. I can lager in August. With a few modifications, I can make warm-fermented fruity Belgians in February.
Freedom. I dig it. Don’t we all?
Trying to keep my cool
With the summer solstice behind us and 3-digit temperatures facing Central Texas, I’ve been giving lots of thought to fermentation temperature control. Fermentation temperature is the most important variable a brewer can control during fermentation, and has a huge impact on flavor. Ales should be kept between 65-72°F during active fermentation, and ideally between 66-68°F for most yeast strains. Too hot and you start to get banana, clove, and bubblegum flavors from esters produced by the yeast (hotter than 80°F and you get fusel alcohols, which give that acrid “firewater” taste associated with cheap spirits). Too cold and ale yeast start go dormant, so fermentation may not complete – although lager yeasts ferment best between 45-55°F.
Here in Texas, “too cold” has never been a problem – with sympathy for my friends in Minnesota and Canada – but “too hot” frequently is. So I use a “swamp cooler” to keep my fermentations cool. This is where you place the fermenter in a big tub filled with cold water, and keep the water cold by periodically swapping out frozen ice packs. I also cover the fermenter with a T-shirt to wick cold water up the sides – some brewers even add a fan to the system. Whatever specific variation you go with, it’s a great way to keep fermentation cool on a budget: for the price of a $7 plastic tub at Target, a decent-sized collection of ice packs (or frozen water bottles), an old shirt and that broken fan in your garage that stopped oscillating in 1998, you can easily keep your fermenter 10°F colder than the room it’s in. My Weiss Blau Weiss Bavarian Hefeweizen didn’t get above 73° all last week, despite ambient temperatures in the house of up to 80°. And the only reason it got that high was because I wanted it to.
But this method has its drawbacks. For one, temperatures fluctuate quickly, and you need to be able to swap out ice packs every few hours. I work from home, so I can do this; but I can’t imagine making this work with a job outside the house. And overnight, the temperature usually goes up 5-7° by morning (sorry, beer: I love you, but not enough to wake up every 2 hours during the night for you) and it takes time to bring it back down.
It’s also messy. Keeping a few gallons of stagnant water in a dark closet for 7-10 days isn’t always a pretty sight. Sometimes, the T-shirt develops mildew and needs to be changed out – unpleasant at best, and a contamination risk at worst (though not a huge one if the fermenter is closed and the airlock filled). And when primary fermentation is done … well, let’s just say that if you’ve ever lifted a plastic bucket containing 5 gallons of liquid wrapped in sopping wet cotton out of a larger plastic bucket, you know how much fun it isn’t.
So I think I’m ready to graduate to a chest freezer with a Johnson temperature controller. It’ll be cleaner, easier, and will give me new power as a brewer. No longer will I be tied down brewing wheat beers during the sweltering Texas summer – I can make crisp APAs and blonde ales, knowing I’ll be able to keep the fermentation cool enough to get a good clean flavor. I’ll also finally be able to make some decent Belgian-style ales, which require gradually ramping up the temperature with better precision than I can get in my swamp cooler. Someday, if I get really crazy, I may even try my hand at making a lager.
I just need to find a freezer that’s big enough for my 8-gallon fermenter but small enough to fit through the door of the Harry Potter closet. It’ll cost a bit of money, but it’s an investment in better beer and more versatility. And really, isn’t that what being a homebrewer is all about?
