The boldness of new beginnings
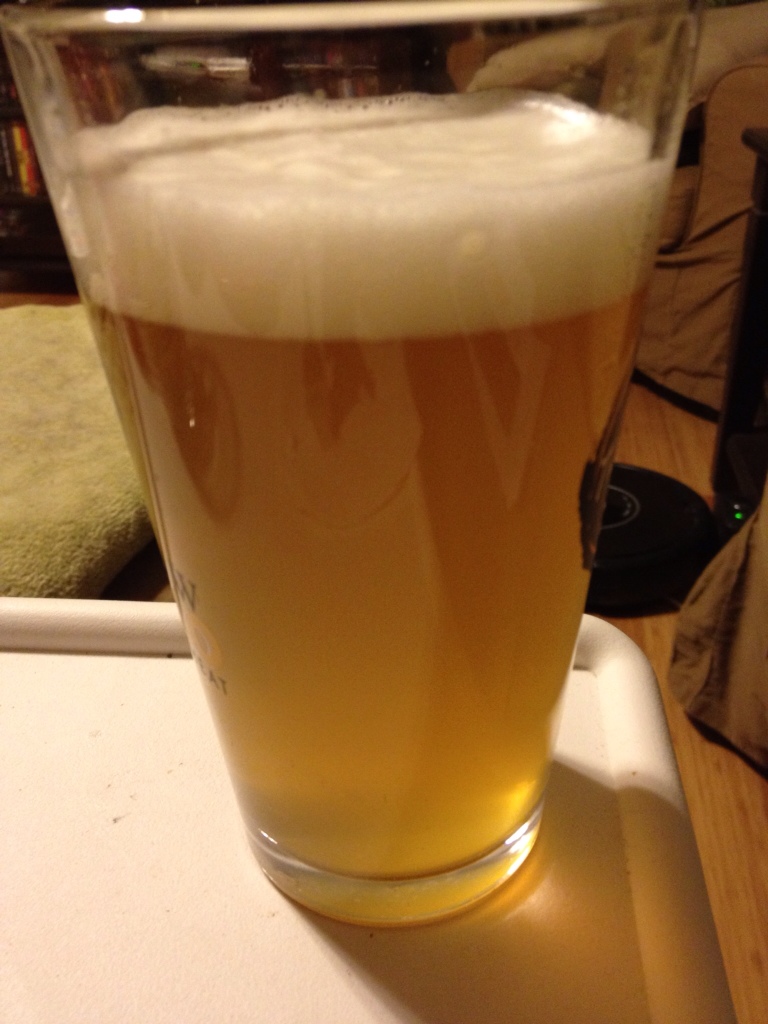
Foaming with abandon in the Harry Potter closet is a 2-liter Erlenmeyer flask on a stir plate, filled with a starter of White Labs WLP008 East Coast Ale Yeast.

She ain’t pretty, but she’s mah baby.
Anyone reading this who has been using liquid yeast without a starter should jump on the starter train. Seriously. It’s as easy as making a tiny unhopped extract brew, because that’s exactly what you’re doing. Just bring 1-2 liters of water to a boil – higher gravity worts will need bigger starters; see YeastCalc for the volume recommended for your batch – add dry malt extract at a rate of 100 grams per liter and some yeast nutrient if you’ve got it. This will make a wort of 1.035-1.040, which is perfect for a starter regardless of the OG of the batch it’s going in. Boil, cool and pitch the yeast. Ferment for 2 days, then cool in the fridge for at least 24 hours before making the “real” wort. Most of the yeast will drop out when chilled, leaving clear (but vile – don’t drink it) “beer” which should be decanted, leaving behind the yeast cake and just enough liquid to swirl up into a slurry. Pitch and watch the magic happen. If you’ve got good sanitation techniques, making a starter carries minimal risk. The rewards are higher pitching rates and better beer. And it’s so easy, there’s no reason not to.
This starter was pitched with yeast that expired in July. I’ve worked with expired yeast before. The yeast/bacteria blend in my Bacillusferatu Berliner Weisse was expired for ten months before I pitched it, though that was into a 1-gallon test batch of a low-gravity wort intended for souring. This starter is going into five gallons of wort for a very different beer: my long-overdue Colonial Progress Ale, from a recipe slightly modified from one I posted in April. Details forthcoming after I brew it this weekend.
As the photo above shows, the expired yeast is spewing so much krauesen I had to wrap it in a paper towel. The expired yeast are healthy as can be, and that’s no surprise. Sure, the expired vial had no more than about 10% of its original population of viable yeast cells, but so what? Yeast cells are dying every day in every carboy, keg and cask in the world, but fermentation continues. Many homebrewers culture yeast from commercial bottle dregs and make great beer with it. Given enough time, even a few sad, dying yeast cells will get their freak on, reproduce and ferment wort. It’s just that the first generations will be weak and languid, and make lots of foul-tasting byproducts doing it.
The purpose of the starter is to make sure those nasty byproducts end up in a beer that’s destined for the drain, not your gullet … while the real wort gets inoculated with a healthy colony of the naturally selected descendants of those few Saccharomycean pioneers who survived the long winter.
So don’t ever be afraid to use expired yeast. Don’t throw it away. You should be making a starter anyway. For fresh yeast, a starter is a leg up. For expired yeast, it’s a new beginning.
Speaking of new beginnings, best of luck to my friends and fellow writers undertaking National Novel Writing Month (“NaNoWriMo”) this November. The goal is to write 50,000 words of a novel in 30 days: fast, raw, unedited. I’ve done it four of the last five years and made it across the 50k mark each time. But I won’t be doing it officially this year. I’ve got too many short stories I want to work on, and a novel already in progress, and I don’t want to distract myself with something new. But I am using November as an excuse to write every day: a blog post, story, novel chapter, anything. I did catch wind of a blog-centric version (“NaBloPoMo”), but I love my readers far too much to subject you all to a bunch of hurried blog posts on whatever random bullshit I can think of to write about.
What do you mean, too late?
Getting Medieval with Ginger Mead
Anyone reading this blog regularly will notice that for the past few months I haven’t really been brewing. I’ve been out of the house a lot, so my homebrew stock hasn’t depleted. Brewing would just net me a backlog of new beer waiting to get stale, not to mention the challenges of brewing outdoors in the Texas summer heat. But now that fall is here, I’ve returned to brewing with a ginger mead from a new recipe. Because ginger is a spice, ginger mead qualifies as a metheglin.
The history/fantasy geek in me loves mead, and it’s hard to find in stores. Most commercial examples are too sweet, better suited to mulling and heating; and my desire to make good easy-drinking mead was a big part of my initial interest in homebrewing. And here’s the big secret: it’s really easy. Meadmaking offers some new challenges for a beer brewer, but the brew day itself is fast and straightforward, especially compared to all-grain brewing. My mead brew day takes 2-3 hours; beer brewing takes me 8 hours from setup to cleanup. There’s no missing mash temperatures. No stuck sparges. No boilovers. No boiling at all – the aroma compounds in honey are volatile and boil off quickly, and honey’s natural antimicrobial properties make sanitizing the must (the pre-fermentation mixture of honey and water) unnecessary.
Preparing a 5-gallon mead must is as simple as heating 2-3 gallons of water on the stovetop, just enough to dissolve the honey (around 110°F), and mixing that with top-off water in the fermenter. I used the 7.5-gallon aluminum pot that usually serves as my hot liquor tank:

In tonight’s performance, “Kettle” will be played by “HLT”.
I used bottled spring water – for no other reason except that I wanted to pre-chill the top-off water, and Target had it on sale. I’ve made great mead with filtered tap water in the past. I heated 2.5 gallons to 120°F while Lisa peeled and diced fresh ginger root.

Chopping action shot!
- 10 lbs Kirkland Signature Clover Honey (Costco store brand)
- 4 lbs Round Rock Honey (local premium wildflower honey)

Los Fermentables.

… and a sore right arm.
I racked this to my fermenter and topped it off to 5.25 gallons with refrigerated spring water. The must temperature equalized at about 80°F with an OG of 1.101. I’m targeting 1.005 FG for medium-dry residual sugar and an ABV of roughly 13%.
Meanwhile, I rehydrated 10 grams (2 dry packets) of Lallemand Lalvin K1-V1116 wine yeast in 2/3 cup of cooled boiled water with 12.5 grams Lallemand Go-Ferm rehydration nutrient. Unlike barley malt, honey is very low in nutrients yeast need to thrive, so adding nutrients to the must is … well, a must. I follow the staggered nutrient addition schedule recommended by a user named hightest on the board HomeBrewTalk.com, which calls for 4.5 grams each of diammonium phosphate (DAP) and Lallemand Fermaid-K nutrient at pitching, with additional nutrient additions later during fermentation (there’s tons of great information from this guy here – as invaluable as Ken Schramm’s The Compleat Meadmaker, which I’ve read cover to cover). I mixed the DAP and Fermaid-K into the must with a healthy beating from my drill-mounted aeration whip, pitched the yeast slurry, and shoved it into the fermentation chiller.
All this week, I’ll be aerating the must twice daily with the whip and adding additional yeast nutrients as necessary. Once primary fermentation is complete, I’ll rack to a carboy and age it for at least six months before bottling. I expect to have to add more ginger again for some additional spice after all that aging, which I’ll add directly to the carboy. If it finishes too dry, I’ll stabilize it and add some of the leftover Round Rock Honey.
Meadmaking is extremely rewarding, and a great step outside the box for any brewer. Even extract beer brewers can make mead easily with a minimum of additional equipment, unlike jumping from extract to all-grain beer brewing. And with so few meads available commercially, it’s a great way to share with friends this ancient libation so rich in history, and yet so mysterious to many.
Tapping the All-Galena Pale Ale
Today I kegged the all-Galena hopped American Pale Ale I brewed on the Fourth of July. That’s 7 weeks ago, a long time even by my standards. Due mostly to my day job, I haven’t had friends over nearly enough this summer, so I didn’t have a free tap until now. The Galena APA has been sitting in the primary in the Harry Potter closet all this time.
On the spectrum of anxiety over long rests on the yeast cake, I’m in the middle. I’m not one of those homebrewers who racks off the primary after a week, and I don’t usually secondary at all. But anything longer than 4-5 weeks and I start to get a little antsy. My inner critic kicks in and I begin scolding myself for letting my busy schedule and personal inertia destroy an innocent homebrew by allowing it to age past the terminus of perfection and into the sinister, uncouth dark age of spoilage. Then I get OCD about it. I sniff my hydrometer samples for the telltale “rotting meat” and “shrimp” aromas supposedly typical of autolysis. Once my fears are quelled, I leave it for a few more days, still fearing that the next time I take a sample, it will be too late.
Yes, I could just rack to a carboy after 4 weeks, but that would risk oxidation, which I consider a much more real and terrifying bogeyman than autolysis. I won’t rack unless I intend to age for a long time.
So I’ve been wary for a couple of weeks. But when I took the last sample before kegging, the beer didn’t smell like my Uncle Brian’s backyard during one of his legendary shrimp boils, so that was a good sign. It doesn’t taste like excrement either – huzzah, bullet dodged again.
But more interesting than this tiny conquest over beer-death (hey, I take the victories where I can get ’em) was the result of the dry hopping.
I added a half-ounce of Galena pellets (12.8% AA) a week ago. I always dry hop APAs and IPAs, but especially wanted to do so this time on account of the hop aroma lost during the long rest. Galena isn’t commonly used for aroma or dry hopping from what I can tell, but reports on the Interwebs had me expecting dark fruit aroma from the dry hops.
Those reports weren’t exaggerated. There’s a definite cherry/berry aroma here. It’s deceiving for a pale ale, as it doesn’t exhibit any of the notes we typically associate with “hop-forward” beers: not floral, nor herbal, nor citrusy. But it’s enticing. Coupled with the bready malt notes of the Munich in the mash, the beer ends up smelling a little bit like cherry pie, more so like a tart blackberry cobbler.
That isn’t coming through in the flavor, but I haven’t tasted it properly (i.e., carbonated and chilled) just yet. That first pint will be one for my personal record book, I’m sure. And I’m already thinking about other ways to use Galena as a late-addition hop: as a component in a late-hopped Belgian dubbel, paired with some Special B malt; or in a dry farmhouse wheat with a little bit of rye or mahlab – yeah, I’m still jonesing to use mahlab.
This could be the start of something unorthodox and awesome. You and me, Galena, we’re goin’ places.
My ongoing gas problem
My name is Shawn, and I have a problem with gas.
Specifically, the carbon dioxide tank in my 3-tap homebrew kegerator. About two weeks ago, I noticed that my beers were getting a little overcarbonated. My regulator, it turned out, was set to a very high 14 PSI. I try to keep it at 10 PSI, which produces an acceptable level of carbonation for most beers; not ideal for all, but it’s good enough and a simple round number.
But when my precious beers were suddenly pouring out as 80% head, I knew something was amiss. So I got on my knees, pulled a keg out of the kegerator to get to the 5-pound CO2 tank at its home on the compressor hump, relieved pressure at the tank valve and turned the regulator screw a tiny bit counterclockwise to lower the pressure. It doesn’t take much to get big results: a few degrees of torque on a quarter-inch bolt can result in a difference of 3-4 PSI, and sometimes it takes a day before it stabilizes.
")
The little bastard causing all the trouble.
But it seemed like it was going to work, for a few days. Then, by coincidence, the tank ran out of gas (I suspected a leak, but thankfully found none). Unfortunately, it was a Monday and I live too far from Austin Homebrew Supply to go there on a weeknight, so I had to wait 5 days before I could get it refilled. Once done, I happily hooked up the newly filled tank and set the pressure to 8 PSI in the hopes that the pressure differential would bleed out some of the extra carbonation in the beer and equalize at the level I’m looking for.
And bleed it did. I poured a pint of Weiss Blau Weiss a few days later, and it was straight-up flat. The regulator was surprisingly at 3 PSI. I was in full WTF mode by this point, until I realized that I set the pressure before I opened all the valves in my gas manifold. 8 PSI with one valve open to one keg dissipated after I opened the other two valves.
Now I think it’s back to normal. We’ll see in a couple of days. And someday I’ll invest in longer beer lines for the system. Longer beer lines mean more distance for the beer to travel from keg to glass, which means it doesn’t come out so fast and so foamy even when the pressure’s a little high. That’s the next logical step, but I’m hoping to put that project off for a less-busy weekend.
Was there a point to this story? No, mostly I’m just venting. But it’s a solid cautionary tale for any homebrewer out there still slaving over a bottling bucket, manually filling and capping 11 bottles for every gallon of homebrew and thinking, “Once I get my kegging system, all my problems are going to be solved!” I once thought that, too.
Nope. Sorry. There will always be problems. Something can always go wrong. Especially when your hobby’s primary equipment options are mostly Frankensteined together by DIYers from common appliances, picnic gear and plumbing fittings. Problems are a given. You just have to roll with them.
But that’s part of the fun. Anybody can go to the store and buy great beer by the case. What makes homebrewers invest the time and the money in all the constant tinkering? Ingenuity. Creativity. And a morbid, wretched drive to find problems that need solving. It’s the same reason I build my own desktop computers from scratch instead of buying them off the shelf. It’s the same reason I’ve been researching and outlining my novel for an obsessively long eight months, poking holes in my own ideas before I write the first page. Like many men, I may shout and curse and bang my fist when a frustrating problem rears its head, but secretly, I love it when a problem arises, because it’s another chance to prove how smart I am by solving it.
So here’s hoping this problem is solved … for now. A pint is calling my name, so I’ll test it soon. But I’ve got hours to kill before bedtime, and who knows what might be waiting for me in there?
Weizen Up
Sorry, Internet, I've been holding out on you. Weiss Blau Weiss Bavarian Hefeweizen, my experiment in simplicity that I brewed in June, has been pouring for over a week now, and I've had several pints of it already; but I haven't yet written about it. It's high time I did, so you can enjoy it vicariously as much as I've been enjoying it … well … the regular way.
Shinin' like Rhine-gold.
It pours beautifully: a creamy golden color with a gleaming white head. It's cloudy, as a hefeweizen should be, and except for a little bit of floating sediment, it looks as good as any commercially brewed hefeweizen I've ever had. The sediment should clear up once I pour a few more pints off the keg. I did use Irish moss for this brew – as I do for most of my brews – but there are many who choose not to use kettle finings for hefeweizens, and it's possible this worked against me in that it precipitated more particles out to the bottom of the keg. But I'm sure it'll be fine in a few more pours.
The aroma is spectacular. Exactly what I wanted: lots of banana esters, a touch of the sweet, grainy aroma of crisp continental Pilsner malt, and the faintest whiff of clove spiciness. That's about it. No hops on the nose at all. Nothing confusing or muddling. You can tell instantly what ingredient created every single component of the olfactory signature of this beer.
The taste is good, too. It's light, of course, and perfect patio refreshment for my next summer brew session. The yeasty character doesn't lead in the flavor department the way I was hoping it would, not like it leads the aroma. I don't usually bother with that little slice of citrus that most brewheads outside of Bavaria are so fond of in their weizens, but I could see a lemon wedge adding something to this beer, just because it could use a bit more zing (sadly, I don't have any in the house). I don't blame the recipe for this little flaw, rather my fermentation temperature. Next time I make it, I'll ferment a couple of degrees higher for the first couple of days.
The mouthfeel is just right for a summer afternoon: refreshing, not too astringent. It goes down smooth and easy, and at 5.2% ABV is pretty session friendly.
So there you have it. Weiss Blau Weiss Bavarian Hefeweizen was an overall success, not despite its simple recipe but because of it. In fact, it seems to me that my efforts to introduce unnecessary complexity to the process – namely, using kettle finings and overchilling during fermentation – was the main thing that kept it from being (to me) a perfect beer. But that's okay; it's still plenty drinkable, and I'm sure I'll be emptying this keg pretty quickly … no complaints here, because I'd love to make it again. Can I make it even simpler next time? Probably not much so, but the lesson has been hammered home: one doesn't need a mile-long list of ingredients to make a damn good beer.
Of course, the Bavarians have been trying to tell us that for centuries.
A Toast To … Art for Brewing’s Sake
As Central Texas is plagued by thunderstorms, I'm stuck in the house enjoying the last of a bottle of Mikkeller It's Alive! Belgian Wild Ale. And I'm raising my glass virtually to Dustin Sullivan, a fellow member of the online homebrewing forum HomeBrewTalk.com, and the creator of this awesome pictorial on how to make a yeast starter.

I love brewing. I love comic art. And I love anything that's educational in a novel and interesting way. This pictorial is all three, and I'm thrilled to have stumbled onto it. I wish everything in brewing could have been explained to me so simply when I was starting out. Sure, learning as you go is 50% of the fun of brewing (another 25% is drinking the results, and the last 25% is being able to impress your friends by dropping words like “saccharification” and “attenuate” into everyday conversation) … but I'm a knowledge addict, and I'm also pathologically risk averse. So I read everything I could get my hands on when I was starting my homebrew habit, so I'd have a good idea of each step of every process before I jumped in. Sometimes, it was hard to separate the good info from the bad: to separate the clear and “just-enough” from the over-explanatory, and to separate the simple sharing of helpful information from the vomiting of brewlore all over you by guys who just want to impress you with how much they know.
Now, I love John Palmer's How to Brew and Charlie Papazian's The Complete Joy of Homebrewing. They're phenomenal books, and essential for anyone entering the hobby. But if I'd had something as simple and clear as Dustin's yeast starter pictorial for my first extract brew, my first mash, my first rack to secondary, let alone my first yeast starter, I'd have lost a lot less sleep as a newbie.
Dustin also created a yeast calculator website called YeastCalc at yeastcalc.com. It's one of the most comprehensive pitching rate calculators I've seen online for liquid yeast. It tells you not only how big of a starter to make, but also allows you to dial in a target specific gravity for your starter, and tells you how much dry malt extract to use for that target. It even has options for calculating multiple step-up starters, for that 10-gallon barleywine you've been wanting to make. I'll be using this site next time I make a starter, and I recommend you do the same.
So I’d like to raise my beer glass to Dustin Sullivan, another homebrewer out there doing his part to make brewing a little easier and simpler for the rest of us: newbies and veterans alike. Thanks, Dustin. Prosit!
Also, anyone out there who isn't yet a member of HomeBrewTalk.com, check it out. There's heaps of information there. If you have questions, it's a great place to turn; if you have answers, we always welcome new insights. And it's the most helpful, responsive and engaged online community I've ever been a part of. If you join, look me up. My username is shawnbou and I'd love to hear from you.
Strike up the Sousa march …
This Fourth of July, I celebrated my right to make beer. Regular readers may recall that a few months ago, I posted a recipe for an American Colonial Ale inspired by a recent trip to Philadelphia. The perfect beer to brew on the Fourth of July! But silly me, I forgot all about it until after I left Austin Homebrew Supply with my ingredients for a different beer. So I’ll have to brew the colonial ale another time. Oops …
Instead, I brewed a single-hop Galena American Pale Ale, the second in my “Misty Mountain Hop” series of single-hop brews (the first was a Citra APA). This was a new grain bill entirely of my own devising, and if the beer comes out well, I’ll probably make it my standard grain bill for all APAs from now on:
- 9 lbs 2-row malt
- 1.5 lbs Munich malt
- 8 oz Crystal 40L
- 8 oz Crystal 75L
The wort looked and smelled delicious coming out of the mash tun, a sort of tangerine-copper color with an aroma like toasted artisan bread. I’ve got high hopes.

Vorlauf action shot!
The hop additions were all Galena, of course. This common bittering hop doesn’t seem to be used often for late hop additions, but I’ve read reviews of a few beers with late Galena hops that had descriptors like “dark fruit” and “tart berry”. Sounds awesome to me. I used:
- .85 oz at 60 minutes
- .5 oz at 15 minutes
- .5 oz at 5 minutes
- .5 oz at flameout
All of my Galena hop pellets were rated 12.8% AA. I’ll probably add another half ounce of dry hops before kegging for added aroma. My OG came in at 1.055, pretty much smack in the middle of the BJCP range for American Pale Ales. I pitched 15 grams of rehydrated Safale US-05 yeast.
But my real declaration of independence this brew session was from my old swamp cooler. After long deliberation (and somehow, writing about the idea a couple of weeks ago made it seem more feasible – thanks, Internet!) I finally bit the bullet and got myself a true temperature-controlled fermentation chamber: a Kenmore 5.1 cubic foot chest freezer with a Johnson Digital Temperature Controller dialed in to a range of 65-68°F.

Crazy. Sexy. Cool.
The Galena APA has been in there for a few days, and I’m still working out the kinks. Last night after I was out of the house all day, it had somehow got down to 60°F, though it was back up within minutes after I cracked the freezer lid for a while. But I can already say that this is one of the best purchases I have made in support of my homebrew habit. Ever. No more checking the closet every hour to monitor the temperature. No more keeping dozens of frozen water bottles on hand, waiting to be used in the swamp cooler, spending their idle time rolling around my garage freezer and making it harder to find more important stuff (like, you know, food). Perhaps most importantly, no more risks of infection from the stagnant water in the swamp cooler, which always bothered me. I just let it do its thing, check it once or twice a day, and it’s always been in the range I want … except for last night, but it’s never gotten higher than 68°F.
And now I am at liberty to brew what I want to brew, any time of year. I can lager in August. With a few modifications, I can make warm-fermented fruity Belgians in February.
Freedom. I dig it. Don’t we all?
Rogue Ales: Losing their relevance?
I’ve got nothing against Rogue Ales. I actually owe them a lot. Living on the West Coast in the early aughts, their beers inspired me long before I was a homebrewer. That smirking libertine on the bomber label, enticing me with interesting names like “Dead Guy Ale” and unique ingredients like hazelnut and soba … these things helped awaken me to the possibilities of what beer could be. I don’t drink Rogue often anymore, but that’s mainly because I drink so much Texas beer. (Coincidentally, I bought a bomber of their Chatoe Rogue Single Malt Ale this week. I wasn’t crazy about it, but I think it was mishandled in shipping. Two bottles in a row were gushers.)
But when I saw this story about a new beer in the works called New Crustacean, fermented with yeast harvested from the beard of Rogue Brewmaster John Maier, I had a pretty strong reaction. There isn’t one part of me that sees this as a good idea. (Hat tip to Heather Null for sending me the story.)
I’m all for experimentation, as long as good flavor is the ultimate goal. Brewing is not an abstract art; the point is to make beer that people will drink. Not that Rogue can’t make a perfectly drinkable beer with beard yeast, but just because something is drinkable doesn’t mean anyone will drink it. So I feel like this beer, at this time, is the wrong idea.
The ick factor doesn’t bother me. I realize they’re not throwing a sprig of John Maier’s hair into every batch. This is yeast propagation we’re talking about here. With the help of White Labs – a name in the brewing community that I trust implicitly – they’re isolating the yeast using science that I can’t begin to understand, and reproducing the strain under sterile conditions. So I’m not worried about the fact that “OMG beard yeast beer sounds gross!” and if anyone reading this is worrying about that, please don’t.
And I’m not worried about some mysterious X-factor in those microbes, either. We’re talking about a guy who’s worked in a brewery every day since 1989; there’s probably more beer yeast in that beard than there is in the air ducts at Rogue. He may even have hop bines in there for all I know. In fact, I’d be willing to put money on that beard yeast being at least 90% genetically equivalent to Rogue’s proprietary house beer strain, Pacman. Besides, we’re always told that nothing can live in beer that’s harmful to humans, and I’m pretty sure the biologists at White Labs know the difference between a viable strain of Saccharomyces cerevisiae and the Ebola virus. So whatever it is, it ain’t gonna kill us.
What bothers me is the message this sends to the non-craft-beer-drinking world. This is obviously a niche product. Few people are going to want to drink beer made with yeast from some dude’s beard, no matter how safe or sanitary it really is. I’m not just talking about the masses out there with their cans of industrial lager. Even craft beer lovers are going to be split on this idea. What Rogue is really telling the world with this gesture is that they’re catering to the extremists: the hardcore beer geeks with their T-shirts from nanobreweries you’ve never heard of, who brag about driving all the way to Russian River to get this year’s Pliny the Elder before it hits stores, all the while laughing over the rims of their pints at the craft beer neophyte at the end of the bar sipping on a 60-Minute IPA. The ones who always have to be more cutting edge than you about their beer habit and would slurp tripel from every goatee, vandyke and ZZ Top in Oregon to prove it. At best, Rogue’s beard beer is a stunt; at worst, it’s an exclusionary tactic executed with pomposity and self-aware irony.
Is that their right? Sure, but all brewers, commercial or hobbyist, are ambassadors of our craft. Anything that brings new beer lovers into the fold helps our craft along. And anything that alienates potential newcomers, or that portrays beer fans as snobs and weirdos, is bad for breweries’ business, and makes it harder for homebrewers to get friends on board. Why risk all that, why do it to the industry and the community, just for a publicity stunt and some bragging rights that no one really wants?
At the end of the day, they can do what they choose, and I can choose not to support it. But it does make me wonder at Rogue’s relevance in the modern craft beer industry if they have to grasp at stunts like this to keep moving. Maybe years ago, they were an unstoppable innovative force, but they’re not the only rogues on the block anymore: now we have Dogfish Head, Jolly Pumpkin, Mikkeller, and others who wow us every season with their originality and marketability … and don’t have to be, as that fabled beer peddler Moe Szyslak once said on The Simpsons about post-modern art, “weird for the sake of weird”.
From the Cellar: Showdown! Commercial vs. Homebrewed Smoked Porter
For this edition of From the Cellar, I opened a bomber of Ranger Creek Mesquite Smoked Porter (6.4% ABV) and pitted it head-to-head against my own homebrewed porter currently on tap: Smokey in a Plain Wrapper Rauch Porter (6.0% ABV).
Smoked porter or rauch porter is one of those style variations that seems to be springing up in all sorts of places spontaneously. Granted, Stone has had their version on the market for over 15 years now, so it’s possible we all got the same great idea from them. But it is a great idea. The astringency and bite of smoked malt plays well against the sweet and malty backdrop of a porter malt bill, giving complexity without having to resort to a ton of hops in the boil. It gives a flavor akin to stout without the sharp roasted barley notes that are so common (though not necessarily required) in a stout. So yeah, I’m a fan; and I was dying to know how one of my own brews stacked up against a commercial offering from one of my favorite up-and-comers in the Central Texas craft beer scene.
I poured a blind tasting of both beers and tried them side by side. I didn’t know which was which until after I had written down all of my notes. Picking a clear winner was tough, so I just judged each on its merits and avoided trying to score them (though I did have a personal favorite).

Beer A
Beer A was nearly black with chocolate brown notes, and tiny bubbles with not a lot of head retention. The nose had some slight but noticeable fruity esters over dark chocolate and coffee. The aroma of smoke was present, but not obvious.

Beer B
Beer B had a much more persistent head and was completely black with bigger and rockier bubbles. There was a distinct woodsy scent and a smell not entirely unlike good Texas barbecue. But the beer had a boozy smell, like it was barrel-aged, which would be a surprise. The thick head and carbonation would suggest that if it was aged, it wasn’t aged for any considerable length of time.
As for the flavor, I generally preferred Beer A even though Beer B was arguably a better crafted brew and a better example of a rauch porter. Beer A was full of dark chocolate and vanilla flavor, with a slight amount of esters and very little smoke. But it was refreshing and easy to drink, and ultimately really satisfying. Beer B was cleaner fermented, but the smoke really, really dominated the flavor … to the point of being almost too much for me. There was some leather and wood in Beer B, but really it was all about the smoke. It was drier than Beer A, but less refreshing because of the harsh, aggressive character I found the smoke imparted.
Within seconds of tasting, I knew which one was mine. Smokey in a Plain Wrapper has been on tap in my kegerator for a couple of months, so I know it pretty well and could pretty much tell it was Beer A. The Ranger Creek Mesquite Smoked Porter was Beer B.
So while the results weren’t shocking, they were very informative. My homebrew was more estery and with less smoke flavor (thus arguably less true to the essence of a rauch porter) than a commercial equivalent. But I would rather drink my homebrew, even when I didn’t know it was my homebrew, simply because it was more refreshing. Am I just getting used to the unique flavor produced in my brewing setup, or am I just subconsciously making beers I like? Or was it simply the fact that I wasn’t crazy about the mesquite smoke in the Ranger Creek beer, and another rauch porter from another brewery (with another kind of smoke) would have fared better? It’s hard to say. It could have been just familiarity with Smokey that made me like it more.
Regardless, it’s great to know that I like my beers not only because I made them, but that they also stack up well against commercial brews. I have no idea how I’d do against the commercial brew before a panel of judges, but as long as I like it and want to drink it (and share it with others) that’s good enough for me. Prosit!
